Creating a Virtual Machine in KeterCloud
This guide walks you through launching your first virtual machine (VM) using the KeterCloud Dashboard.
Creating a Windows Machine follows slightly different steps, follow this guide for help with that: Creating a Windows VM in KeterCloud
Step 1 – Navigate to the Server tab
Log in to KeterCloud. If you don't have an account, here's a link to our docs on Creating Your KeterCloud Account
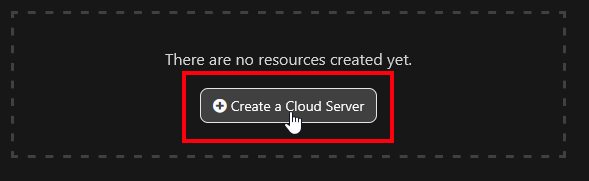
Go to the KeterCloud Dashboard https://dashboard.ketercloud.com and navigate to the "Server" tab.
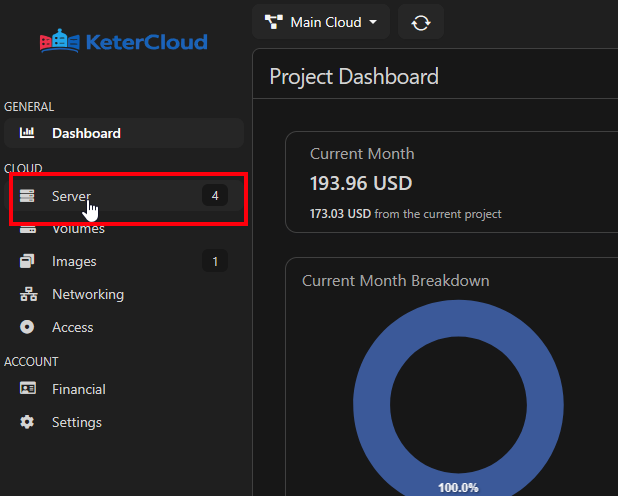
Then, click "Create a Server"
Step 2 – Select a Datacenter Location
First, select which region you'd like your server to be created in.
Distance from a server to a user can affect ping and download/upload speeds, and cannot be changed, so choose wisely!

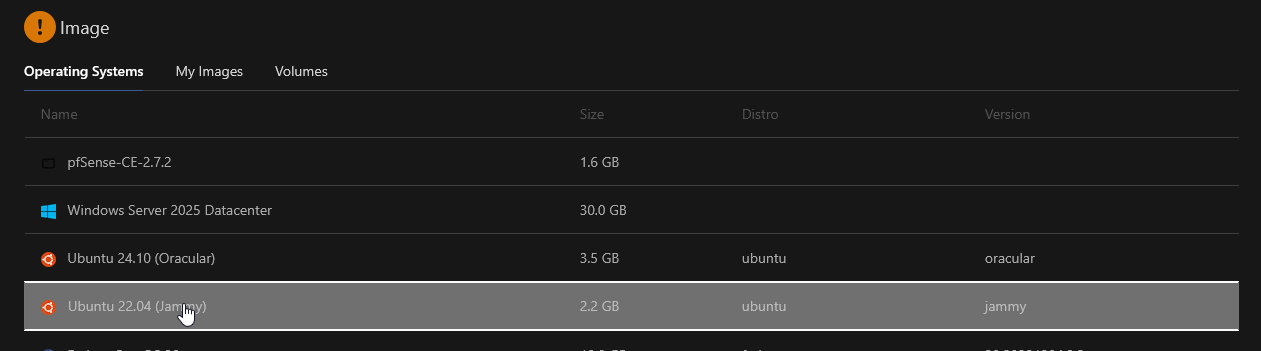
Step 3 – Choose an Image
Select a disk image for the VM. This will be the operating system that the VM will run on.
If you'd like to upload your own disk image, here's a link to our docs on Uploading a Custom VM Image
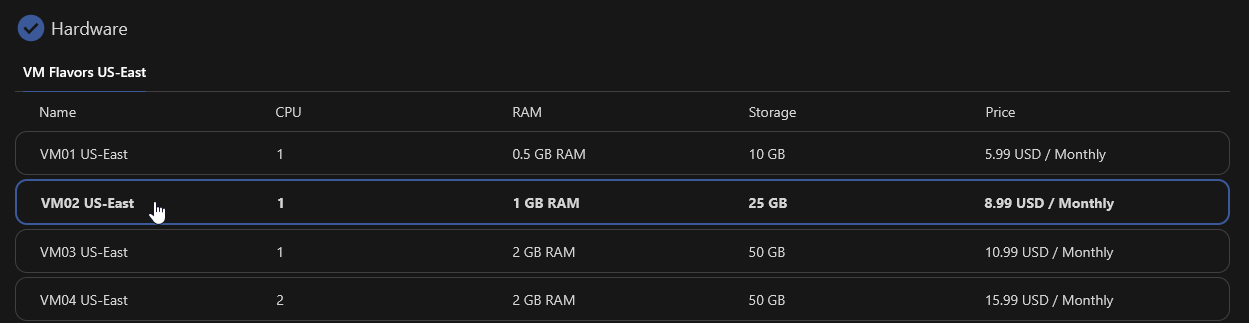
Step 4 – Choose a VM Flavor
Pick a flavor. This affects the vCPUs, RAM, and Storage capabilities of your VM.
VMs can be later rescaled but ONLY to other flavors with equal or higher Storage capacity (hard limit in order to prevent data loss).
You can also create Volumes to attach to your VM but they must be manually recognized on the OS level after they are added.
You can also see a full list of our flavors and pricing at our Pricing Page
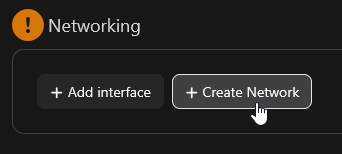
Step 5 – Configure Networking
Networking is a crucial step in order to properly allow secure access to your VM.
First, delete the default "external" network interface

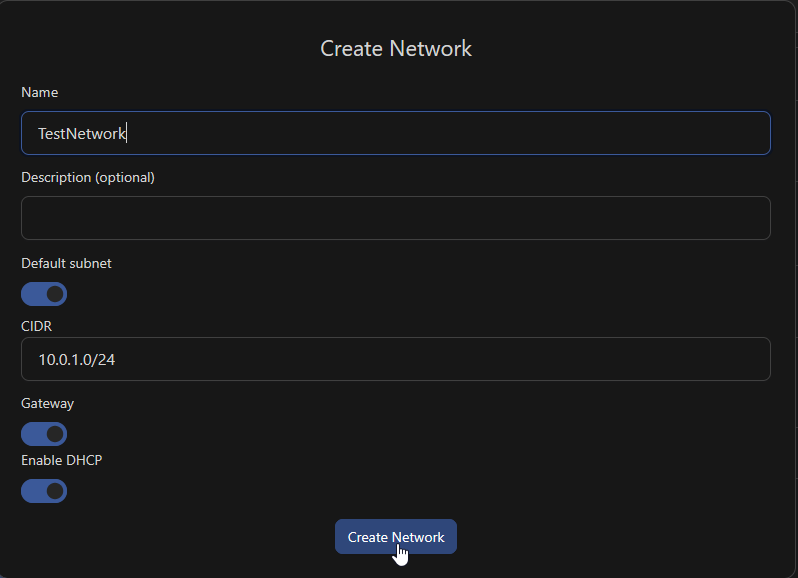
Next, click "Create Network"
Give your network a name, leave the default subnet and Gateway on, and make sure to enable DHCP. Then, click Create Network to confirm.
This will be a private network interface on your VM. After we create the VM, we will connect it to a public router.
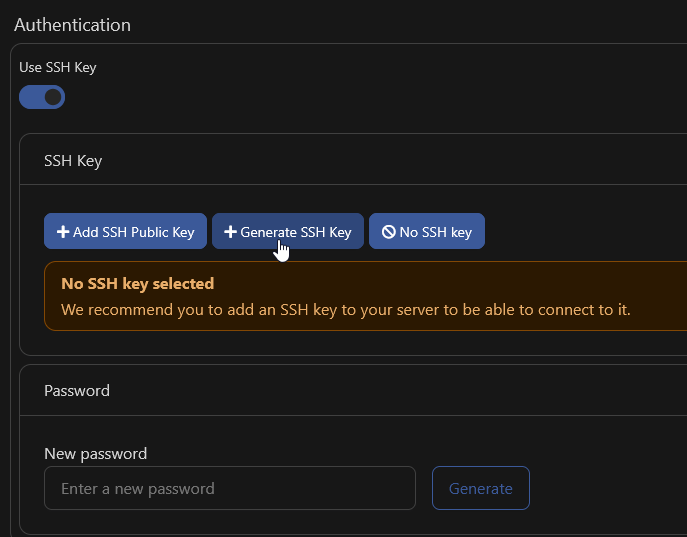
Step 6 – Authentication
Choose your access method:
- SSH Key (recommended)
- Password (less secure)
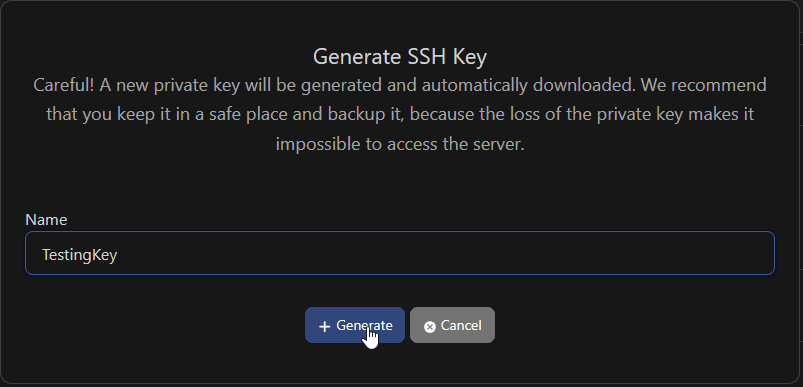
You can add your own existing SSH key, or generate an SSH key in-platform by clicking the "Generate SSH Key" button.
 If you generate a key, after you click "Generate" the private key will be downloaded by your browser.
Step 7 – Cloud Config
The Cloud config section allows you to set up "Cloud Init" - a system which allows you to automate configuration of cloud systems during the boot process. You can read more about it here: Cloud Init Docs
Step 8 – Security Groups
Security Groups function as a filter for which ports and protocols are allowed to reach your server.
If you haven't set up a security group for this server, you can follow this guide and assign it after we create the server: Creating a Security Group
If you already have a security group set up, simply click "Add Security Group" to assign it to the server.
Being aware of your Security Groups settings for your VMs and setting them up properly can save you hours of troubleshooting in the future. When in doubt, check the Security Groups!
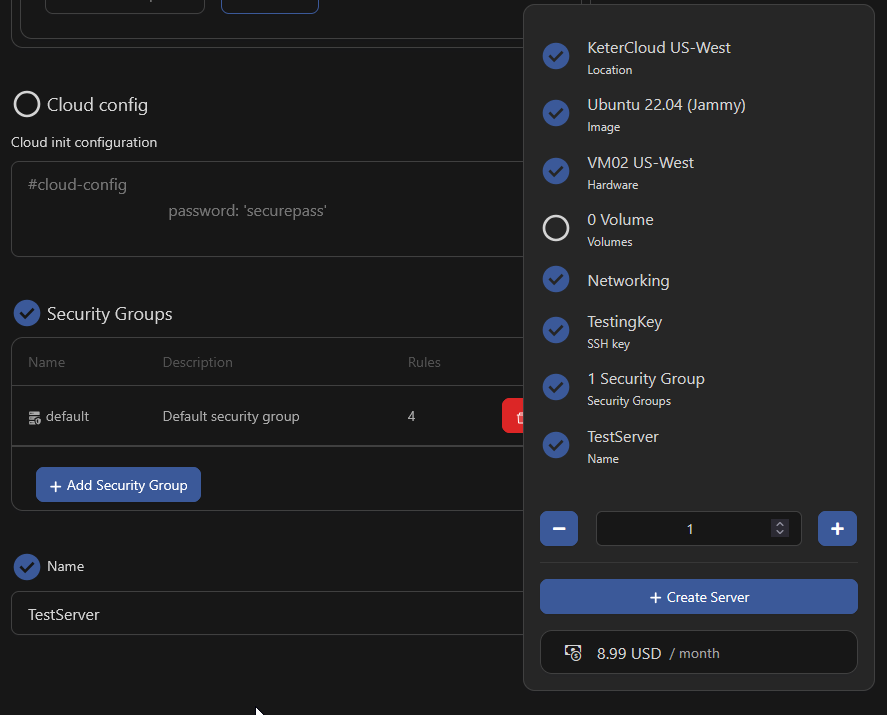
Step 9 - Name and Create Your VM
Finally, give the VM a descriptive name and review the final settings of the VM on the right side of the screen.
When you're ready, click "Create Server" to begin provisioning your VM.
Step 10 - Routing
Now that your server is being created, let's add a router which will allow your private network interface to communicate with the internet.
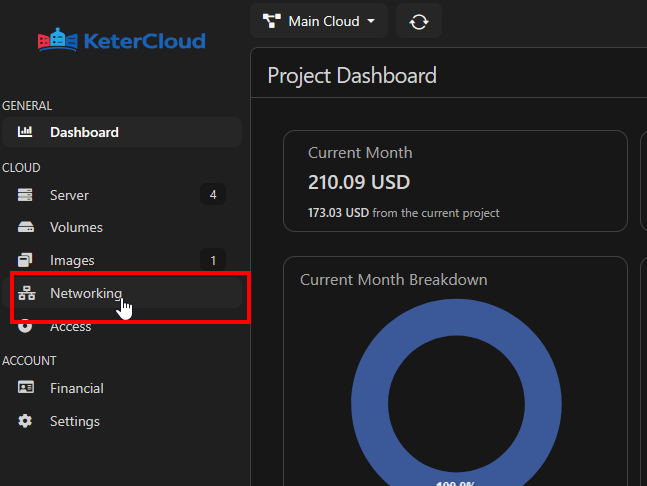
First, go to the "Networking" tab in the sidebar.
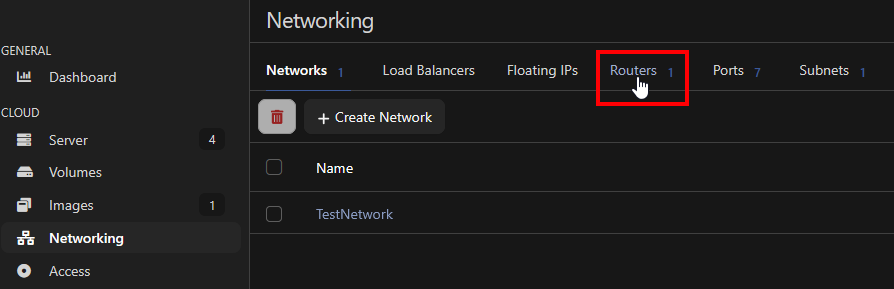
Here we'll see the "TestNetwork" network which we created along with the VM.
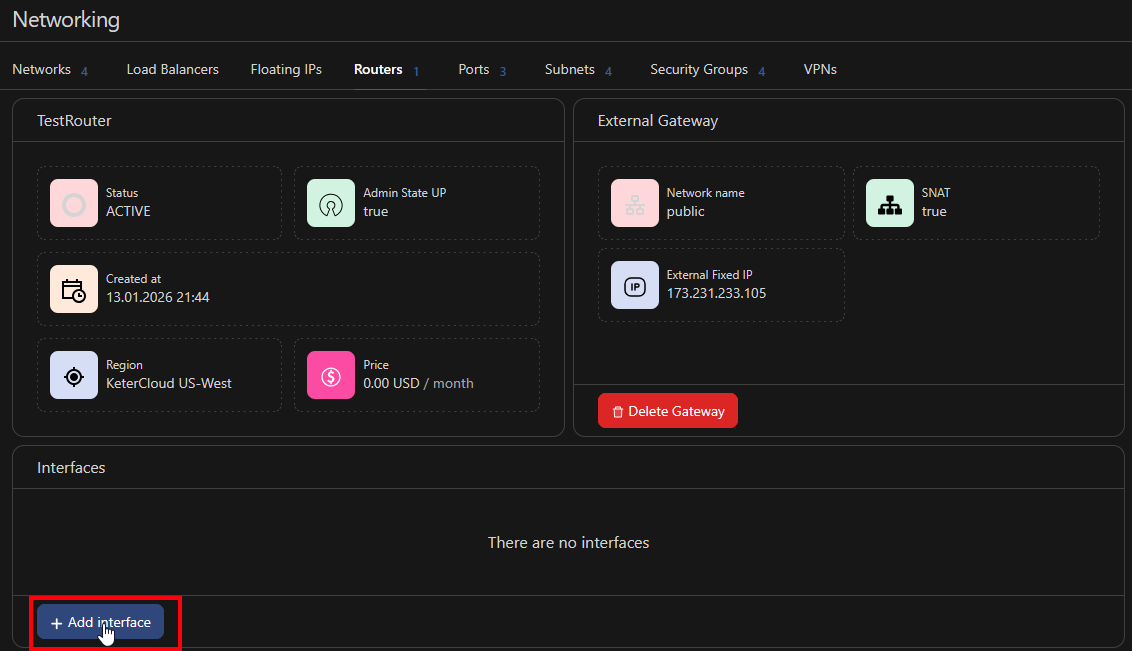
Next, click the "Routers" tab.
A router is a virtual device that connects private networks and links them to the external network. This will connect your private "TestNetwork" to the internet.
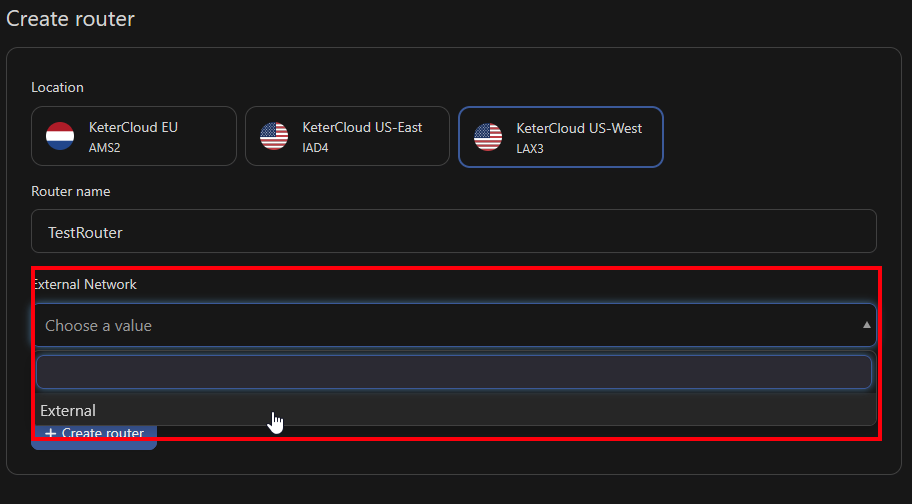
To create one, click "Create router", select the datacenter location of your VM, and give the router a name.
Select "External" as the External Network to connect it to.
Then, click "Create Router". You'll be greeted with the router's settings. Next, click "Add interface" to open the interface selection menu.
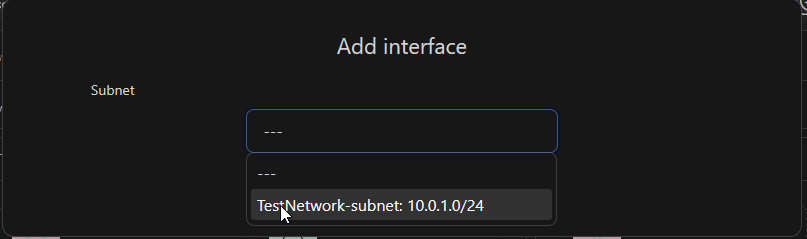
and select the network interface we created when creating the VM in Step 5 and click "Add interface*"
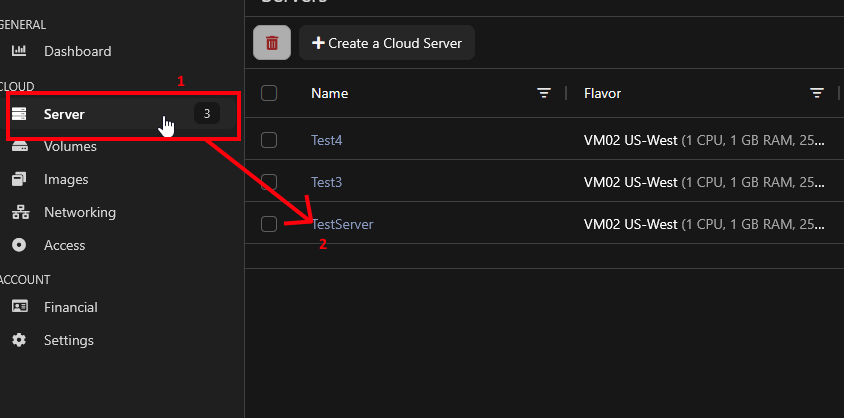
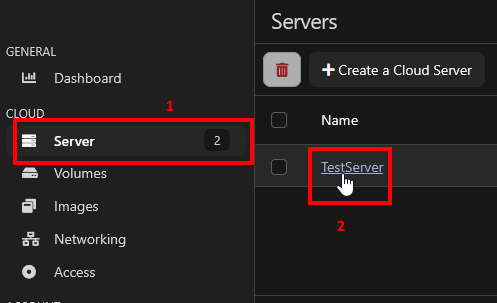
Next, navigate to the "Server" tab and select your server.
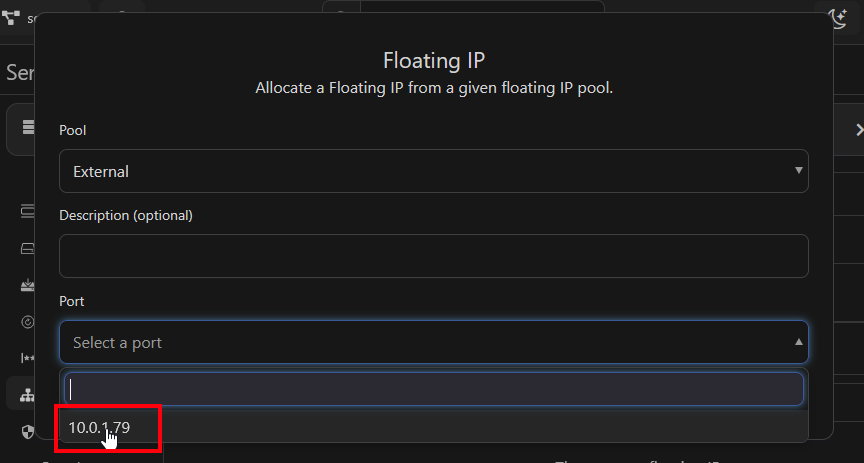
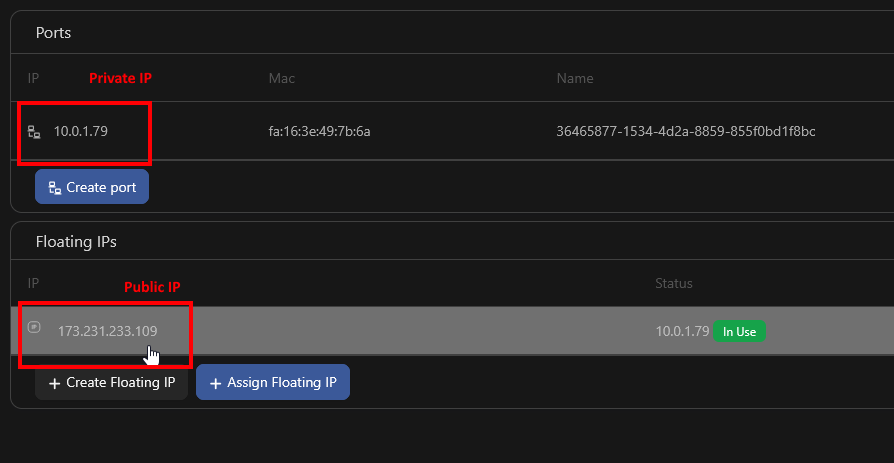
Now click on the "Networking" tab. Note the port IP under "Ports" and then click "Create Floating IP"
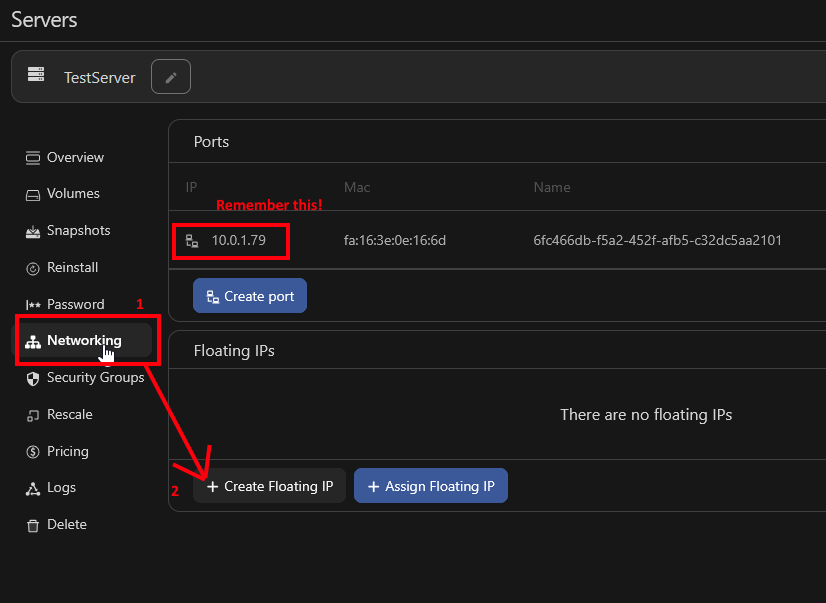
Now click "Select a port" and select the port you saw assigned to your server, and click "Create" to assign a floating IP to that port.
Done! Now you should see two IP addresses on the networking page, a public IP visible under "Floating IPs" and a private IP visible under "Ports".
Step 11 - Security Groups
If you didn't add a security group during VM creation, now is the time to add the proper security groups.
To create a security group, follow this guide Creating a Security Group
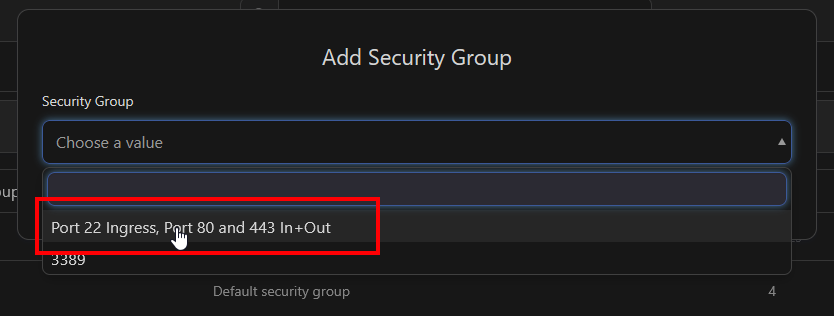
To assign a security group. Go to "Server" in the sidebar and select your VM.
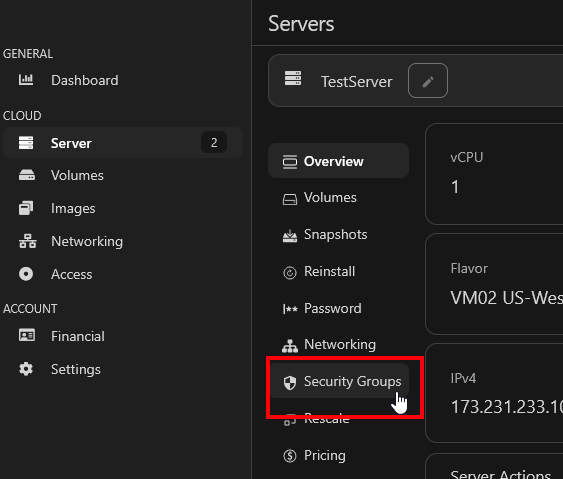
Then click on "Security Groups"
Next, "Add Security Group"

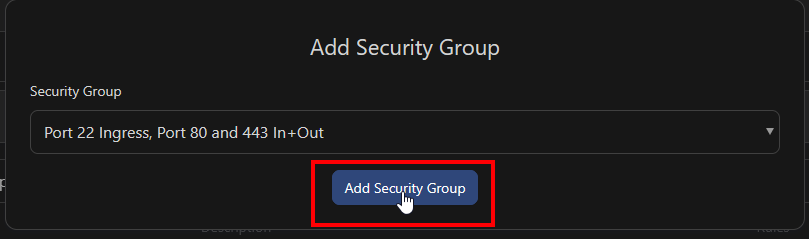
Select your security group, in this case "Port 22 Ingress, Port 80 and 443 In+Out", and click "Add Security Group"
We're done! We can now connect to the server via SSH.
You can use the SSH key you generated in Step 6 to connect via CLI, or using a terminal manager like Tabby or the classic PuTTY.