Creating a Virtual Machine in KeterCloud
This guide walks you through launching your first Windows VM using the KeterCloud Dashboard.
Step 1 – Create a pfSense VM
First, you'll need to create a pfSense VM. You can follow our normal Creating a Virtual Machine guide, but you need to keep a few things in mind while doing so:
- Select the pfSense-CE-2.7.2 image when choosing an operating system.
- Leave the default "External" network during VM creation and do not create a new one. We'll work on that later in the guide.
Step 2 - Set up WAN and LAN networks for the Firewall
Next, we'll make the required WAN and LAN networks for the firewall.
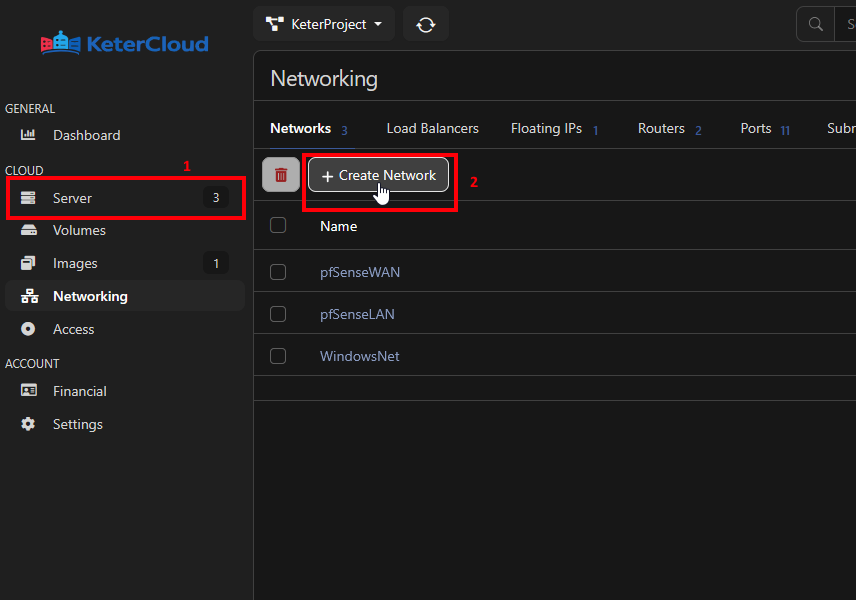
Select "Networking" and then click "Create Network"
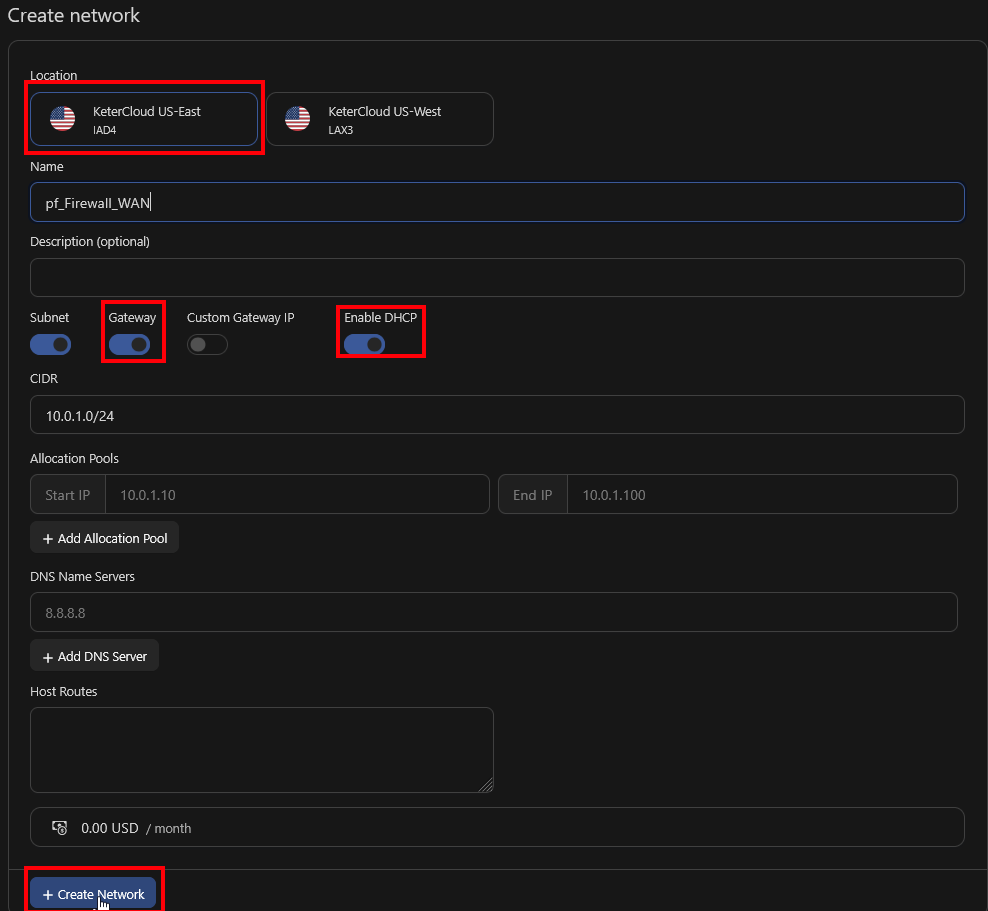
Let's start with the WAN network. Make sure it's in the same datacenter as your pfSense Firewall server. Give it a name identifying it as the WAN network, enable the Gateway and enable DHCP.
Note the Subnet is 10.0.1.0/24
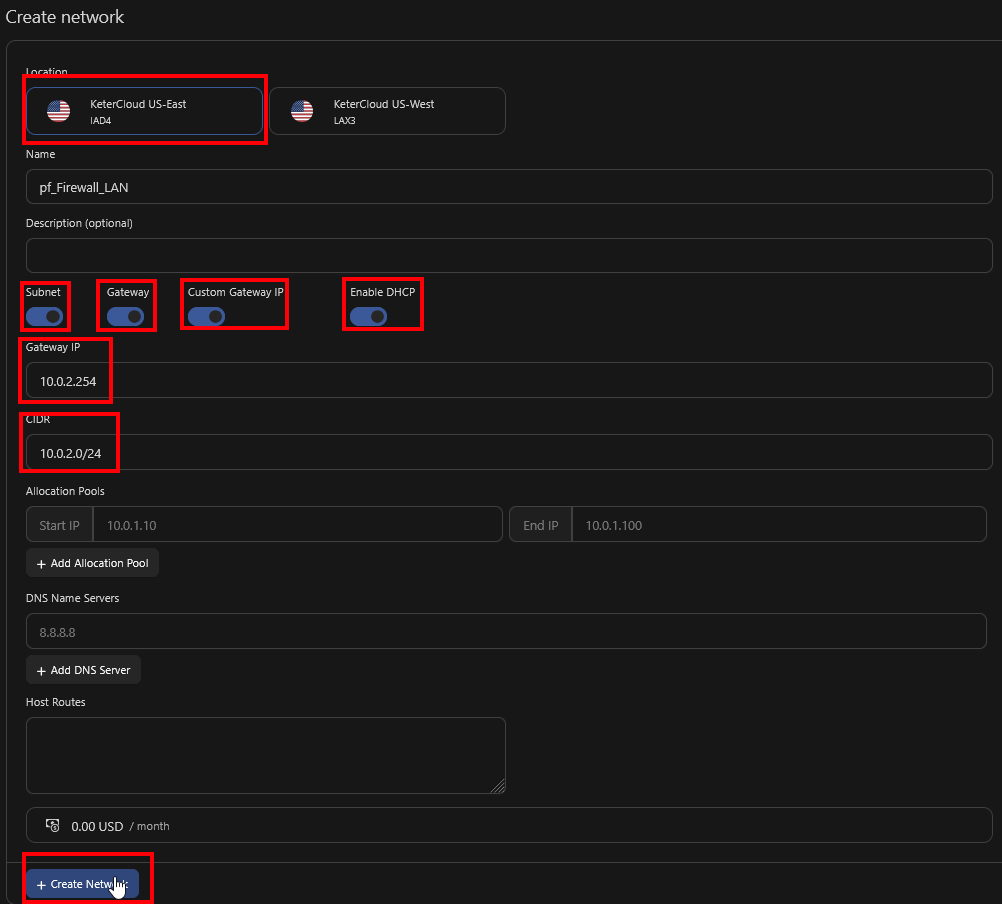
Now let's make the LAN network. Make sure it's in the same datacenter as your pfSense Firewall server. Also, make sure to differentiate the subnet. Here we're using 10.0.2.0/24.
We'll also enable the Gateway and set a Custom Gateway IP too, as 10.0.2.254, and enable DHCP.
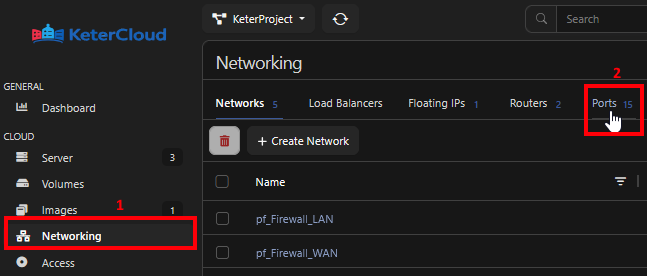
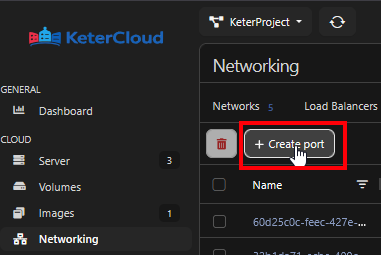
Now, lets create ports. First, click the "Ports" section in the top bar.
Then, click "Create Port"
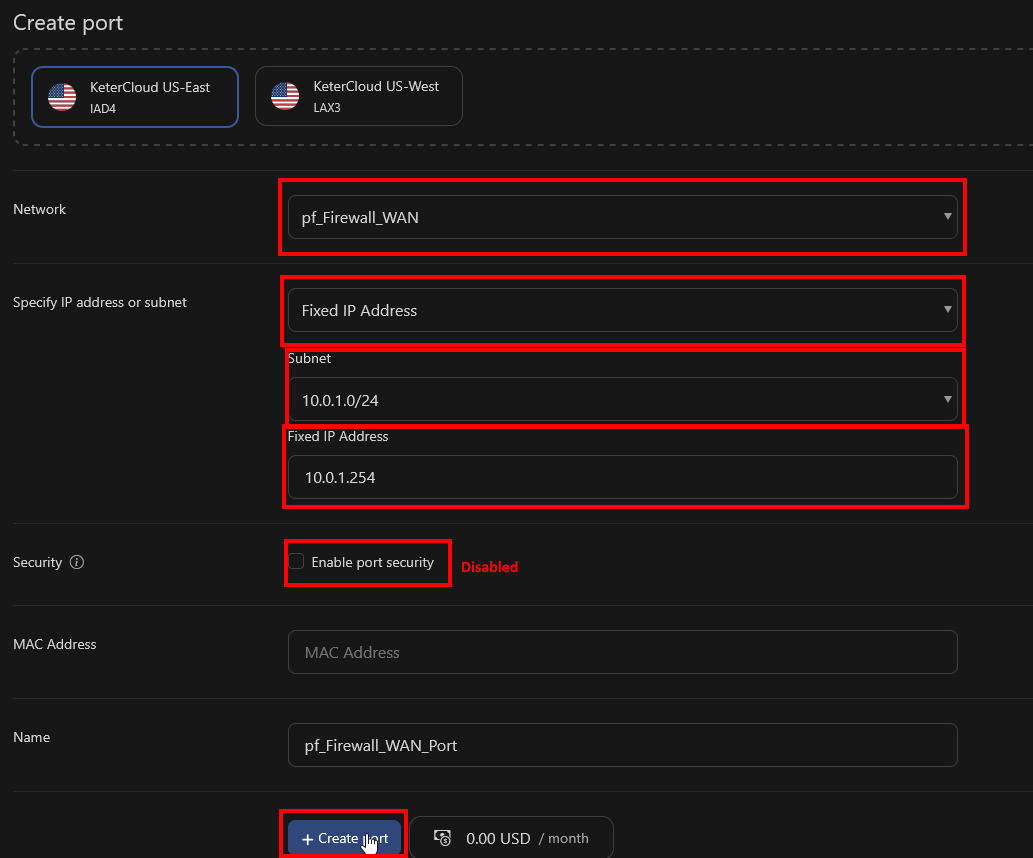
We'll start with creating a port for the WAN network. Select the WAN network under the dropdown for "Network". Select a fixed IP address, select the subnet, and give it an IP. Here we're using 10.0.1.254 for simplicity. Disable "Port Security" (we'll be managing security from the firewall itself) and click "Create Port"
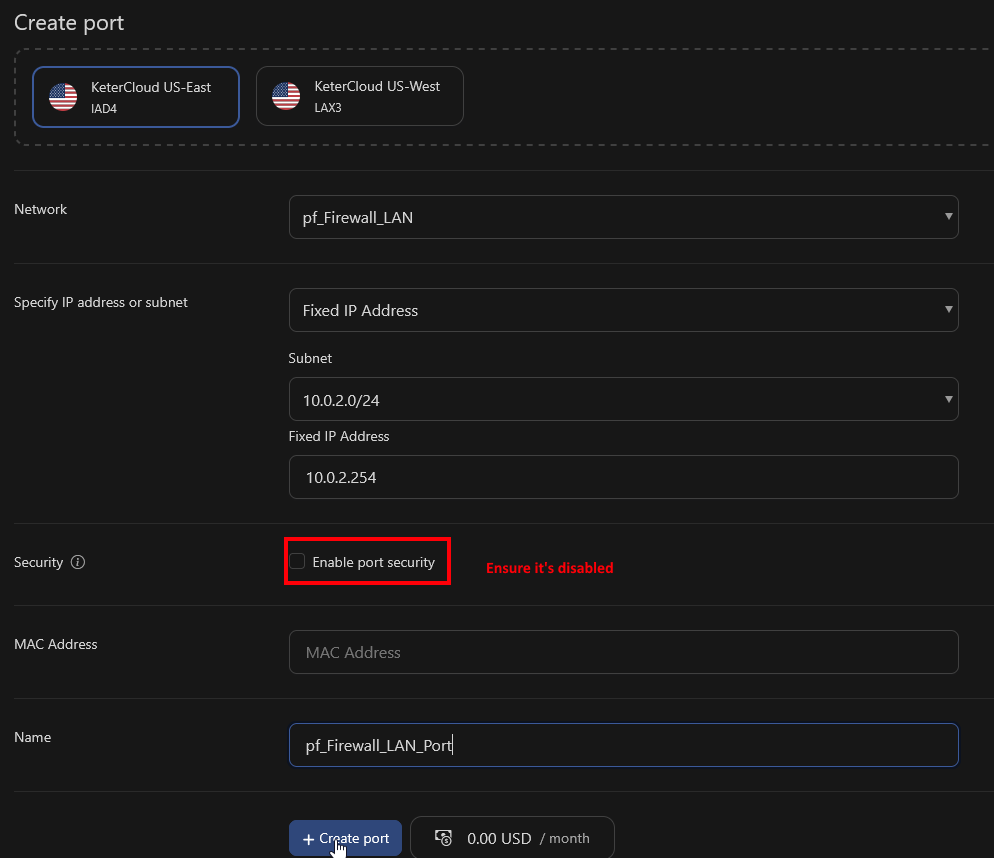
Now do the same for the LAN network.
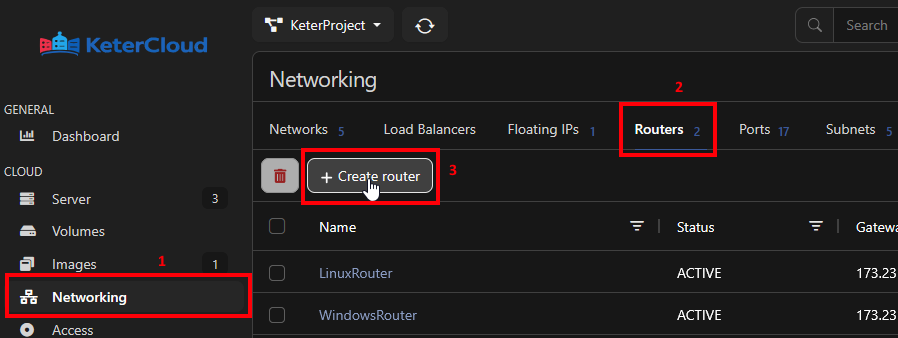
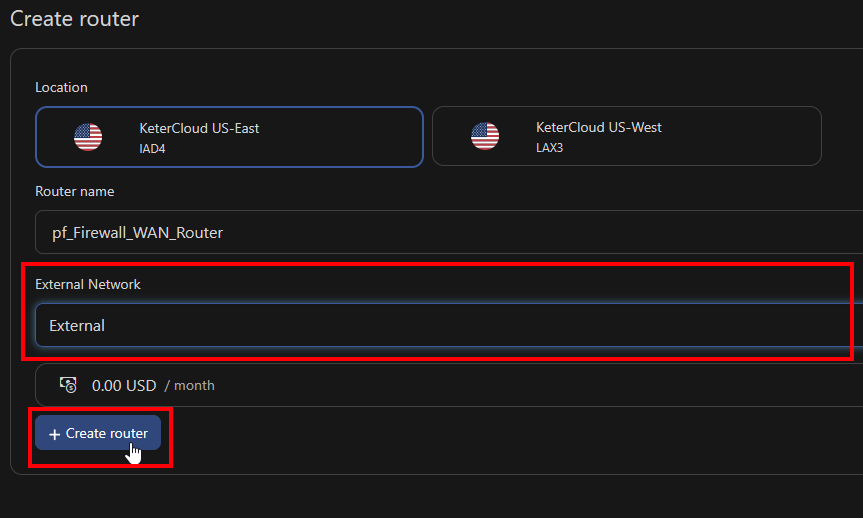
Now lets create a router for the WAN so it has access to the internet. Go to "Networking" and select the "Routers" option in the top bar. Then click "Create Router"
Make sure it's in the same datacenter as your pfSense server, then give it a name and select "External" as the external network.
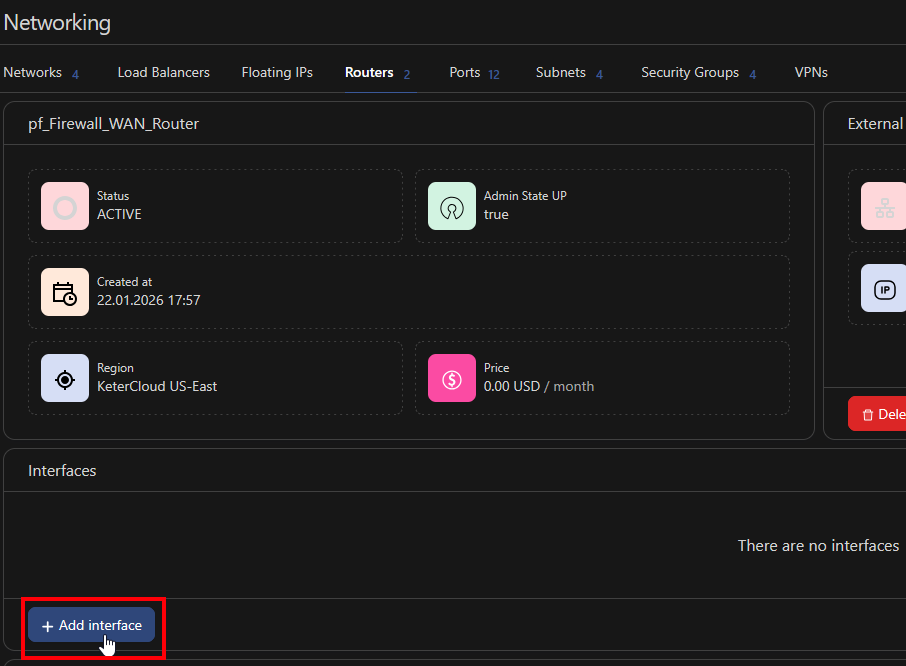
Next, use the "Add interface"
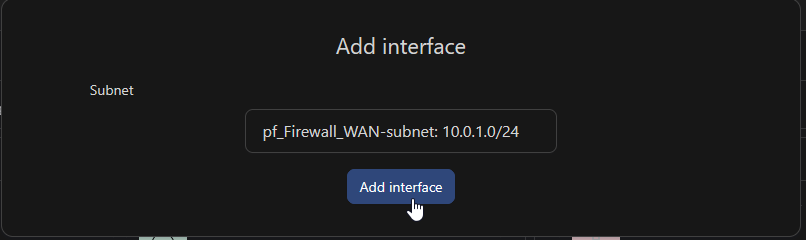
Select the WAN interface and click "Add interface"
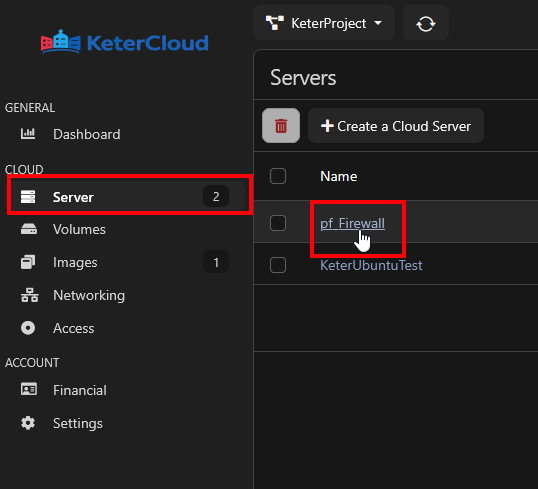
Now let's remove the default network interface from our server and add our new ones. Click "Server" in the left sidebar and select our created pfSense Firewall server.
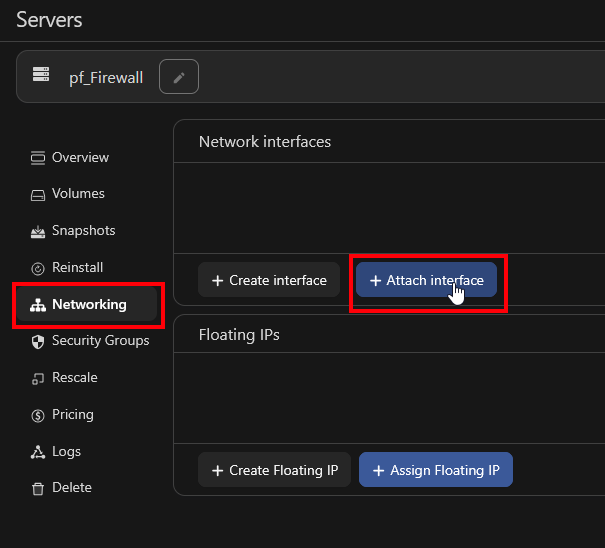
Next, go to "Networking" in the server options. First, delete the default network interface. Click the "-" sign next to the default network, enable the "Delete the interface" checkbox and then click "Detach"

Now select "Attach interface"
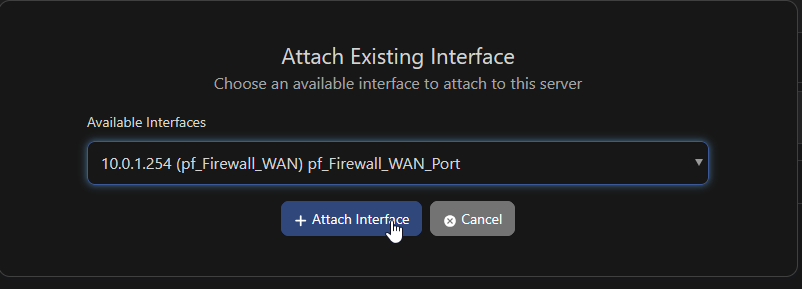
Select the WAN Network and click "Attach interface". Repeat for the LAN network.
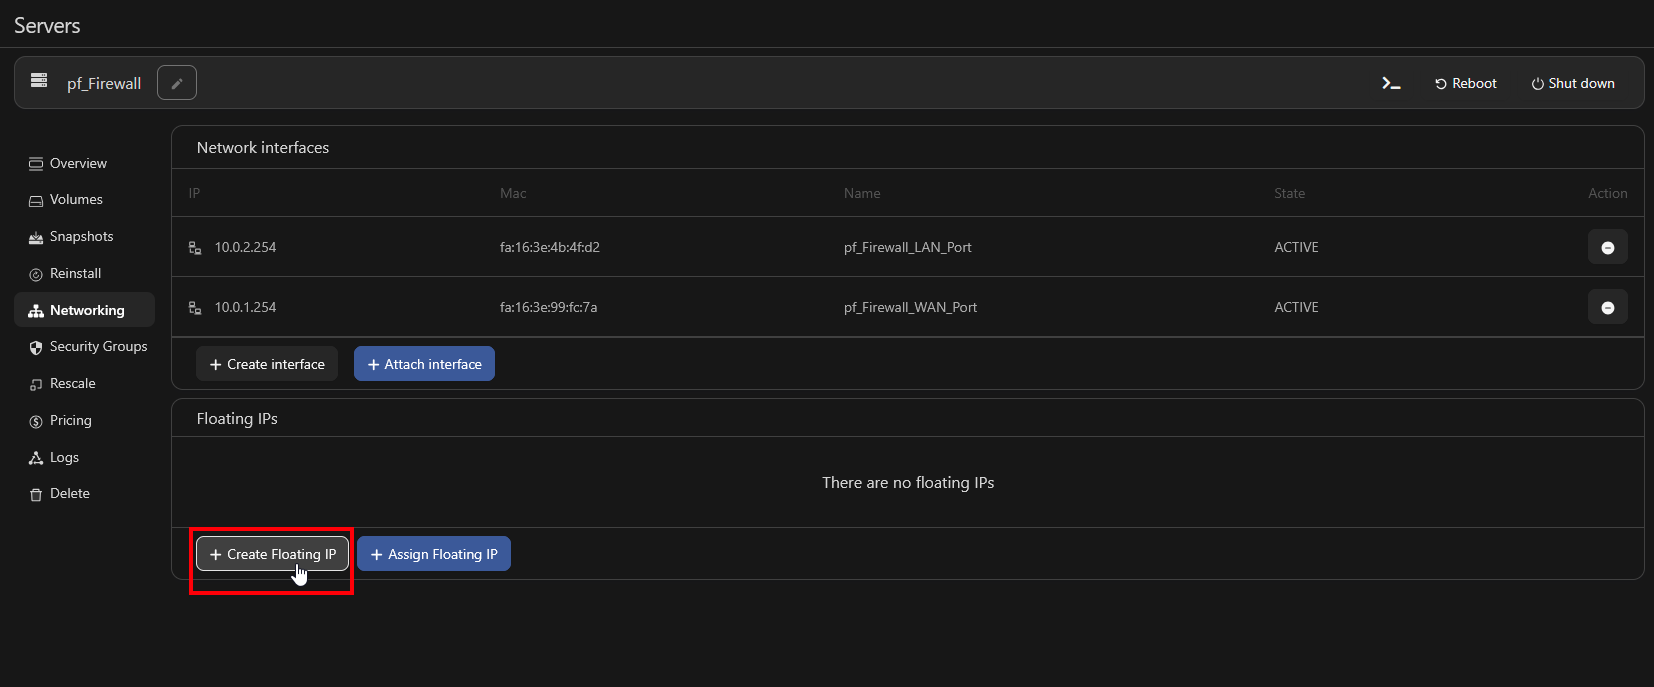
Now we can add a floating IP address. Click "Create Floating IP"
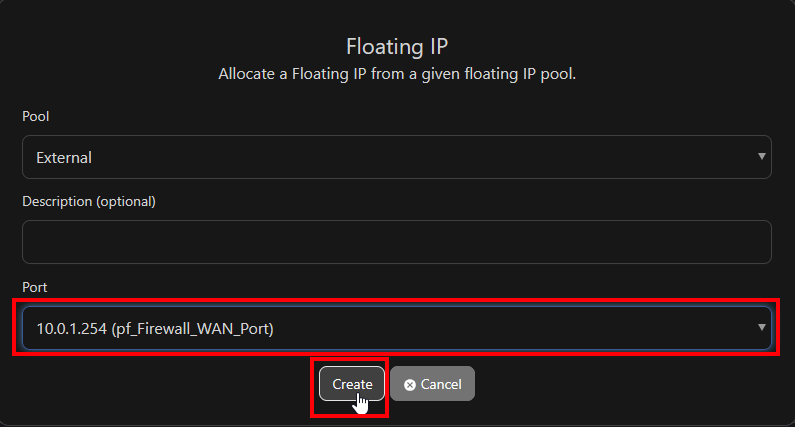
Under "Port" select the WAN port and then click "Create". We should now see our externally accessible floating IP address attached under "Floating IPs"
We now have our networking set up on the KeterCloud side. Let's navigate to the Console and attach the interfaces in pfSense.
Step 3 - Set up pfSense through the Console
First, reboot the server with the "Reboot" button. Wait for the server to finish rebooting, and then click the ">_" console button in the top right to access the virtual console.
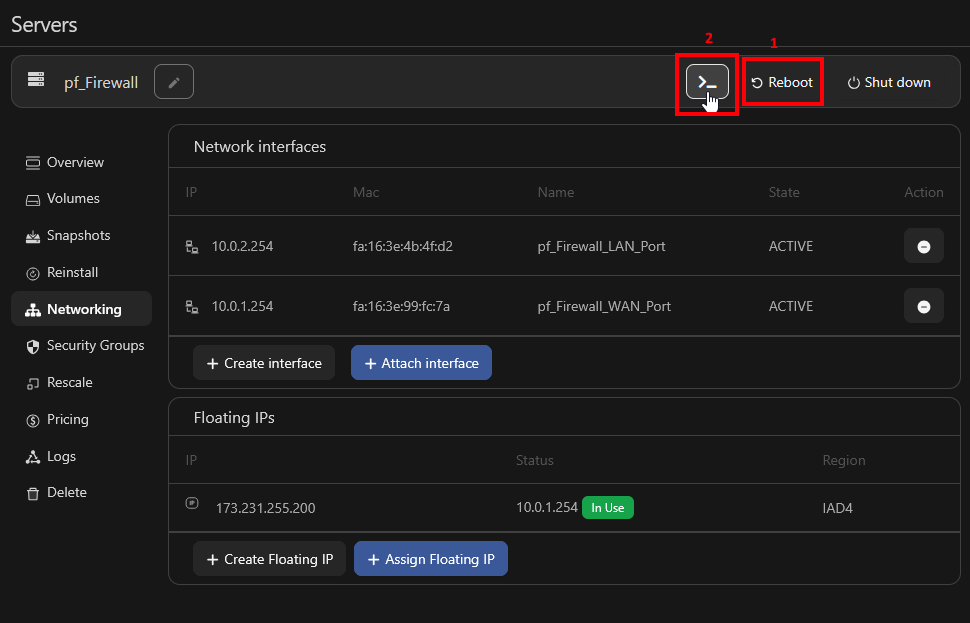
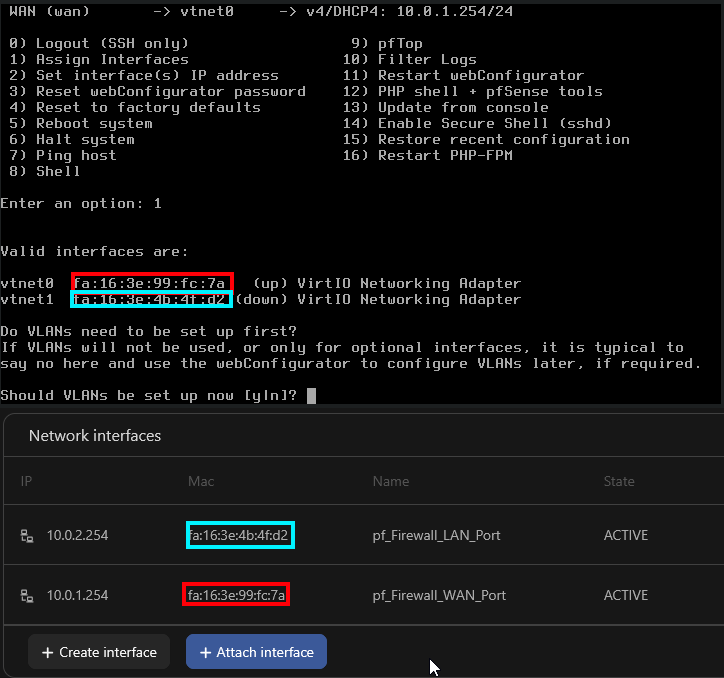
You should be faced with this screen. Let's start with Assigning our network interfaces. Type "1" and hit enter to begin assigning our network interfaces.

Here we can see the two network interfaces. In order to differentiate them, we can look at their MAC addresses. If we compare the MAC addresses, we can see that vtnet0 is the WAN interface and vtnet1 is the LAN interface.
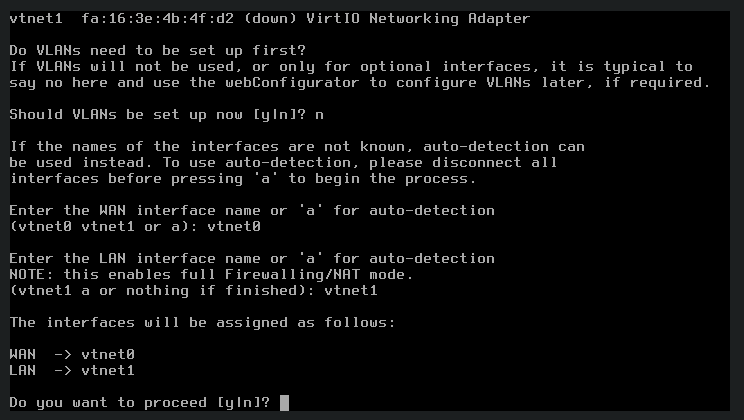
Let's go through the prompts for assigning our interfaces. We can select "n" for setting up VLANs, in our case select "vtnet0" for our WAN interface, and "vtnet1" for our LAN interface.
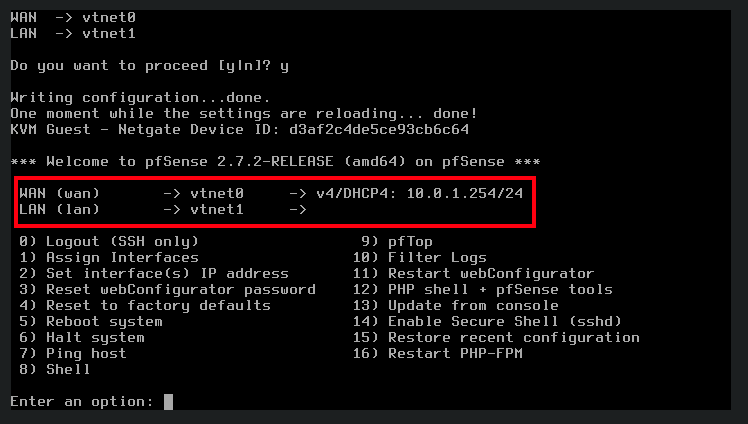
Once we're satisifed with our answers, we can select "y" to proceed.
Now we can see that our WAN and LAN networks are set. Let's assign IP addresses. Select option "2" to begin IP address setup.
We'l start with the WAN interface. Answer "n" to set via DHCP, *"10.0.1.254"" as the WAN IPv4 Address, "24" as the subnet mask, and "10.0.1.1" as the IPv4 Upstream Gateway.
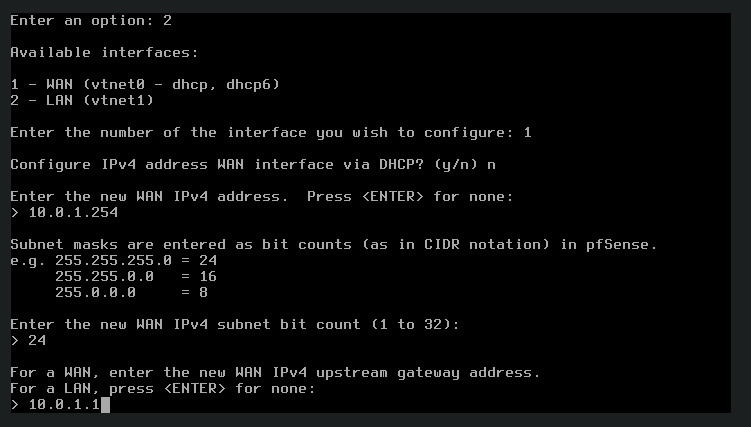
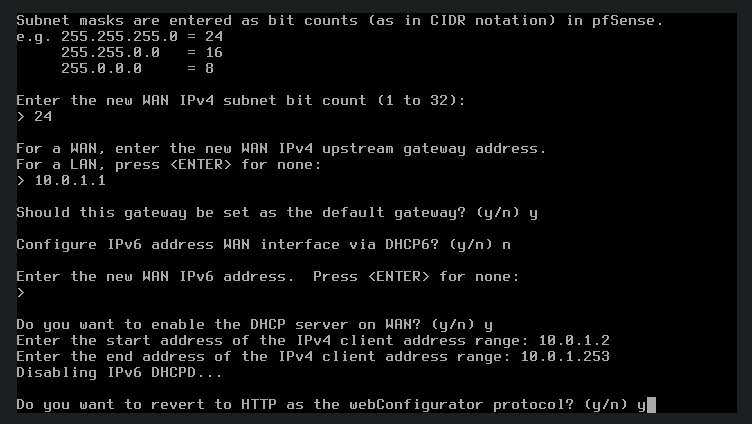
"y" to set it as the default gateway, and "n" for configuring an IPv6 address via DHCP, then press Enter to skip entering an IPv6 address.
Select "y" to enable the DHCP server on the WAN interface, and set the range as 10.0.1.2 to 10.0.1.253, and "y" to enable reverting to HTTP as the webConfigurator protocol. Once it's done, press "ENTER" to continue.
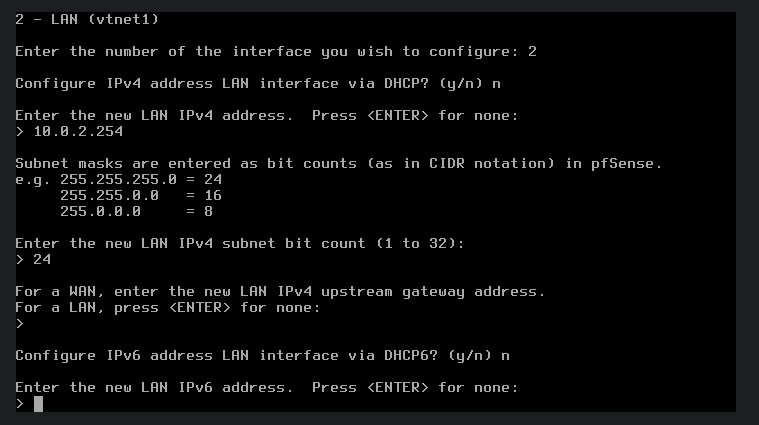
Now let's do the same for the WAN interface. Select option "2" again, and this time select the LAN interface.
Select "n" for configuring the address via DHCP, "10.0.2.254" as the IPv4 address, "24" as the subnet mask, and just click "ENTER" to skip the IPv4 Upstream Gateway.
Then select "n" for configuring an IPv6 address via DHCP, then press Enter to skip entering an IPv6 address.
Select "y" to enable the DHCP server on the WAN interface, and set the range as 10.0.2.2 to 10.0.2.253. Once it's done, press "ENTER" to continue.
Our pfSense firewall is now ready to use with a WAN interface, a LAN interface, and a floating IP address.