Creating Your KeterCloud Account
Getting started with KeterCloud is quick and simple. Follow the steps below to create your account and access the cloud dashboard.
Step 1 – Visit the Signup Page
Go to the Signup Page and fill in your information.
- Use a strong, unique password
- Never share your credentials
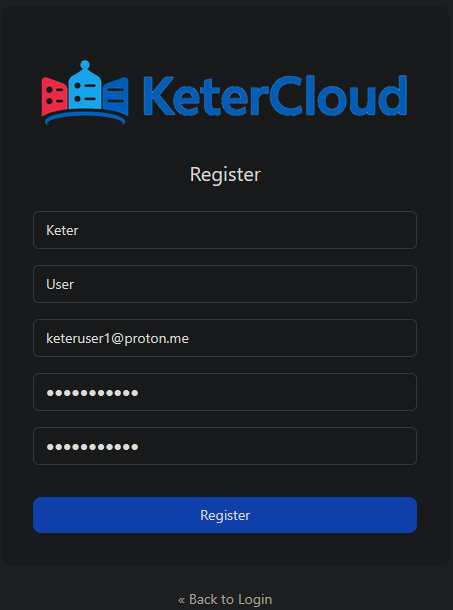
Click Register.
Step 2 – Verify Your Email
Check your inbox for the verification email.
Click the Link to e-mail address verification to activate your account.
Note: If you don’t see the email, check your spam folder.
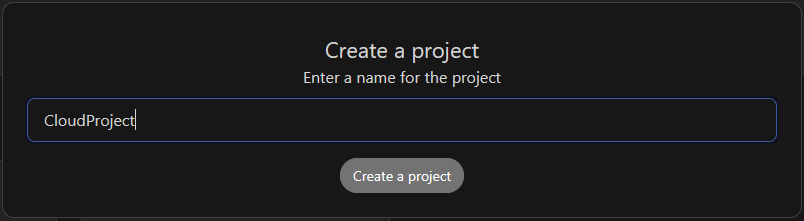
Step 3 – Create a Project
First off, you'll need to create a project. This is an easy way to organize your VMs into separate groups.
Once the project is created, click it to continue setup.
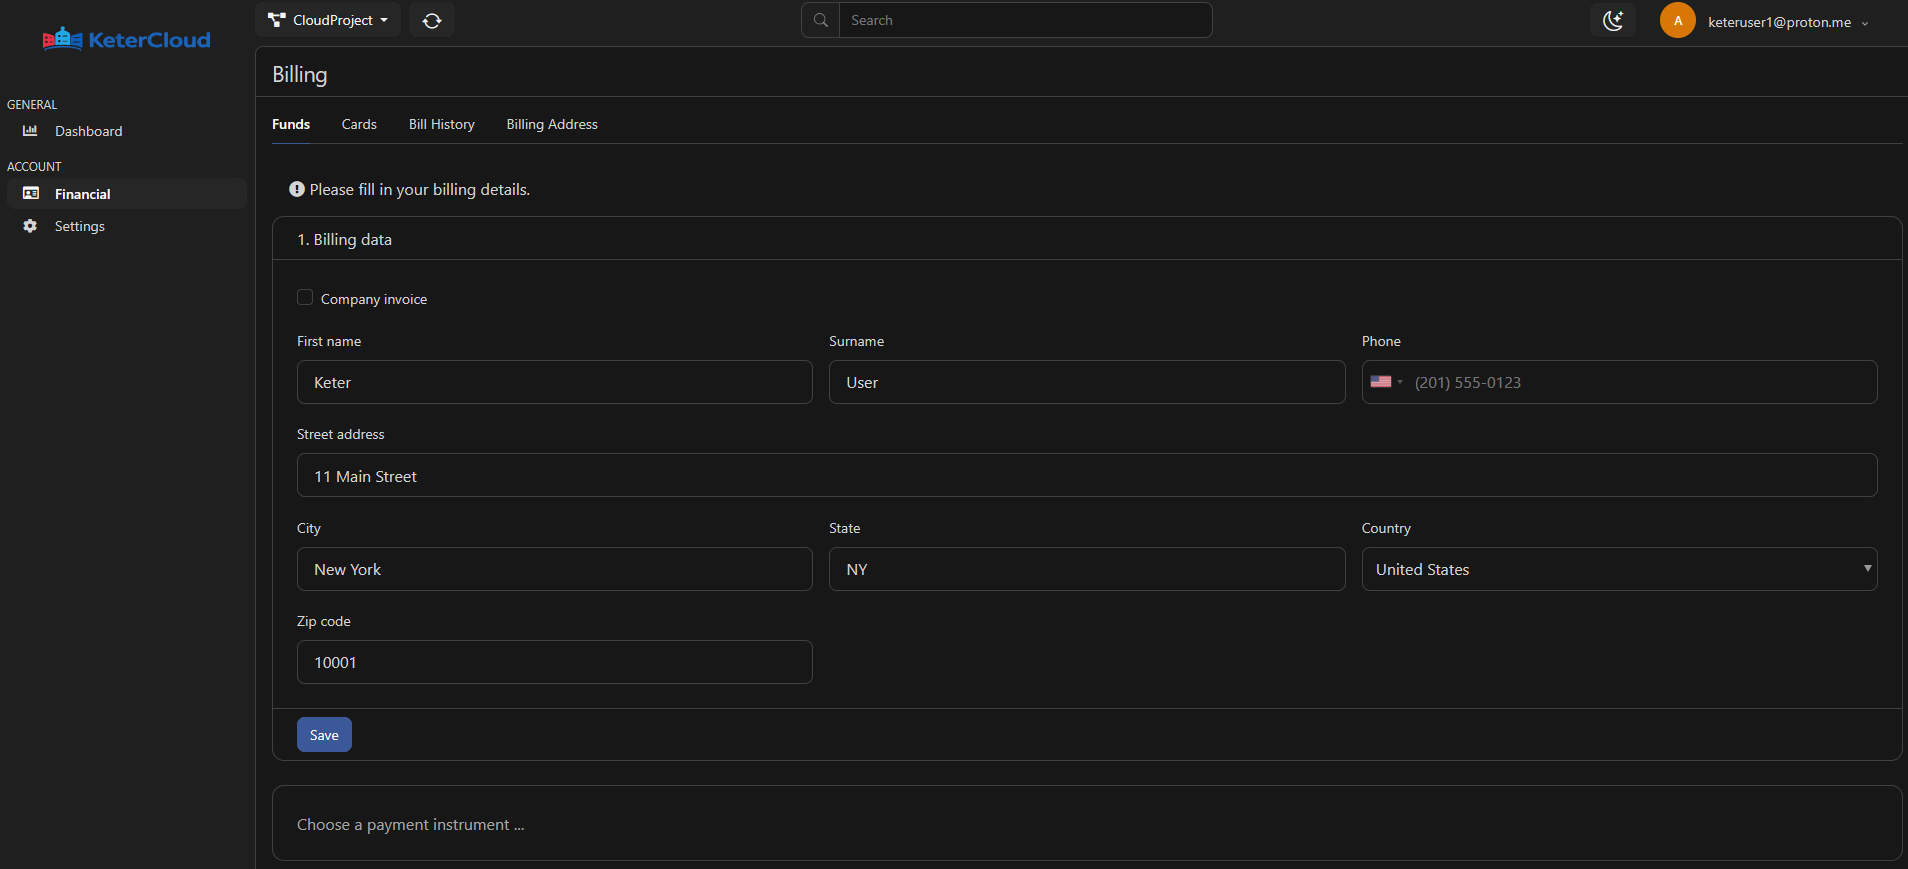
Step 4 – Add Billing Information
Next, you'll need to fill in your billing information.
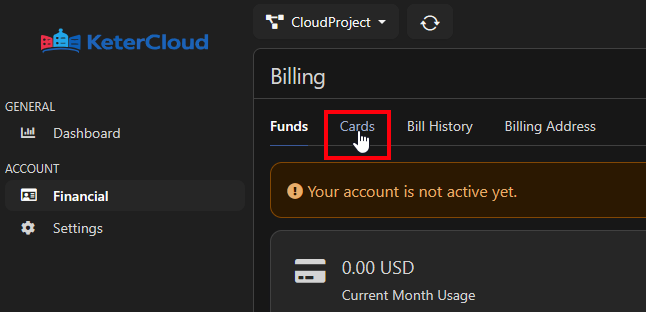
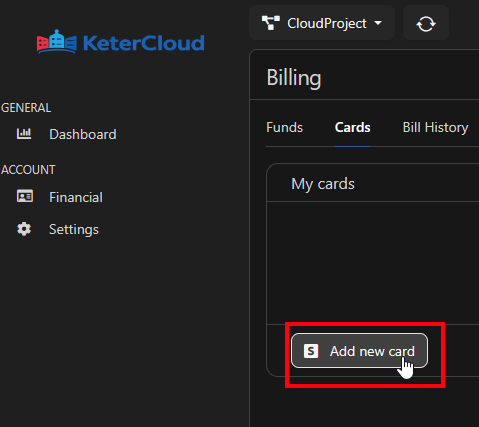
Step 5 – Add Credit Card Information
You can add a specific amount of credits through the "funds" tab at this point, but it's easier to just have a credit card on file to avoid running out.
Click the "Cards" tab at the top:
Then click "Add new card"
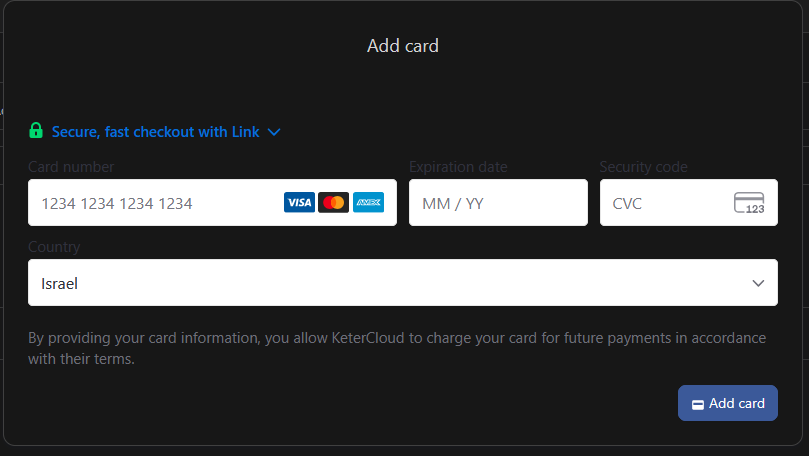
Finally, fill in your credit card details. All of your credit card information is processed securely through Stripe.
Done!
Your KeterCloud account is now ready to use, and you can begin creating virtual machines, configuring networking, and managing your cloud infrastructure.
Check out our docs on Creating a VM for next steps.